
Boost your product management process by integrating EchoRivo with Asana. Follow this step-by-step guide to get started.
Connecting EchoRivo to Asana: #
Navigate to EchoRivo Dashboard:
– Open the EchoRivo Dashboard.
– Go to the Settings tab.
– Choose Integrations.
Link to Asana:
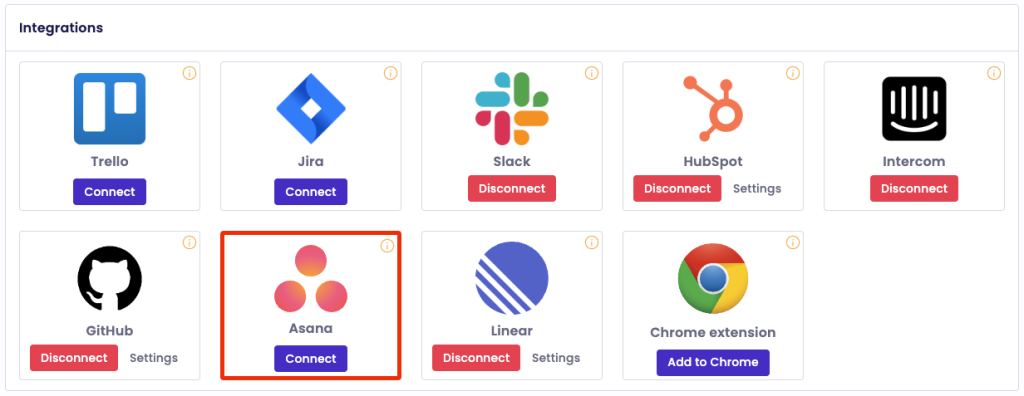
– Find Asana from the list.
– Hit the Connect button next to Asana.
Authorize Access:
– Log in with your Asana credentials when prompted.
– Select Allow to give EchoRivo permission.
Importing Backlog Items from Asana to EchoRivo: #
Access Asana Settings in EchoRivo:
– From your dashboard, locate the Asana integration segment.
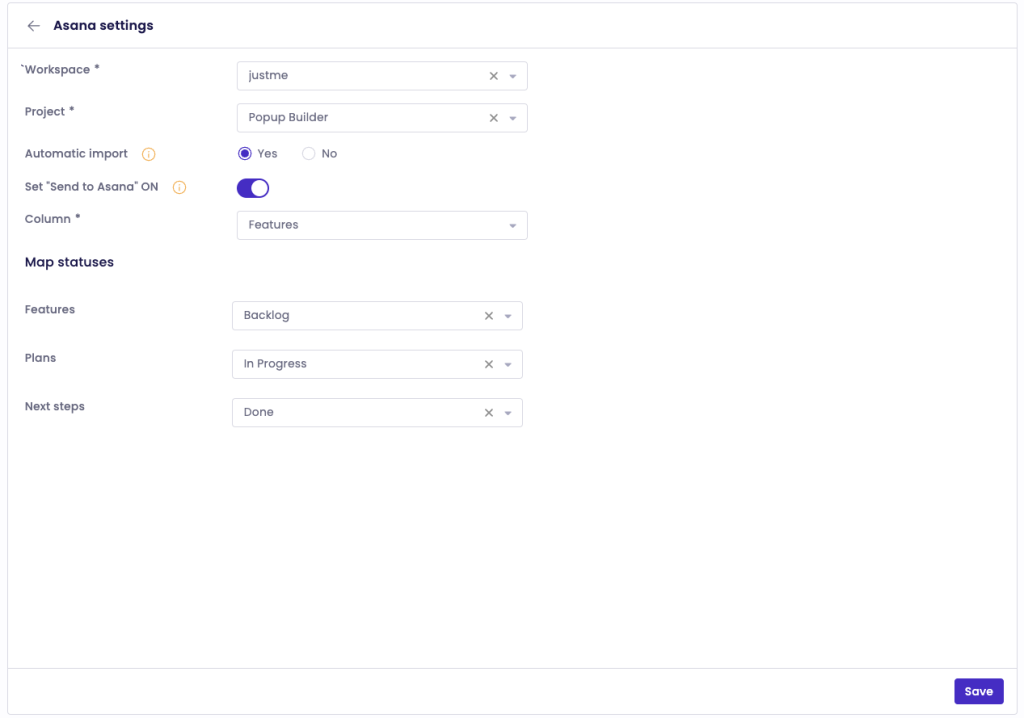
– Click on Settings.
Set Up Backlog Item Import:
– Within Asana Settings, select the particular project you wish to sync.
– Turn on automatic import for new Asana tasks.
– Match Asana task statuses with EchoRivo’s backlog statuses.
– Validate your preferences by clicking Save.
Inspect Imported Backlog Items:
– Transition to the Backlog segment within EchoRivo.
– Scrutinize the items that have been imported from Asana.
Note: If you want to shift backlog items from EchoRivo to Asana, ensure to configure the appropriate settings in the backlog section.